Reasons to Choose a T-Post Fence and Best Construction Practices
Introduction
A T-post fence is a popular choice for many property owners due to its versatility, durability, and cost-effectiveness. Whether you are looking to enclose a garden, secure livestock, or mark property boundaries, a T-post fence can be an excellent solution. In this article, we will explore the reasons why you should consider building a T-post fence and provide you with the best practices for its construction.
Reasons to Choose a T-Post Fence
There are several compelling reasons to choose a T-post fence:
Versatility: T-post fences can be used for a variety of purposes, including containing livestock, delineating boundaries, and providing support for various types of wire or mesh fencing.
Durability: T-posts are made of high-quality materials, such as galvanized steel, which ensures their long-term durability and resistance to rust and corrosion.
Cost-Effectiveness: T-post fences are generally more affordable compared to other types of fencing options, making them an attractive choice for those working with a limited budget.
Easy Installation: T-post fences are relatively easy to install, especially when compared to more complex fencing systems. The installation process can be completed with basic tools and does not require specialized expertise.
Adjustability: T-posts can be easily moved or repositioned, allowing for flexibility in adjusting the fence layout according to changing needs or property requirements.
Compatibility: T-posts work well with various types of fencing materials, such as barbed wire, welded wire, or electric wire, making them suitable for different applications.
Best Practices in T-Post Fence Construction
When constructing a T-post fence, it's important to follow these best practices:
Planning: Start by carefully planning your fence layout and determining the number of T-posts and materials you'll need. Consider factors such as terrain, the purpose of the fence, and any local regulations or restrictions.
Marking and Measurements: Use stakes and string to mark the fence line accurately. Take measurements and ensure consistent spacing between the T-posts, typically 8 to 10 feet apart depending on the fence type and purpose.
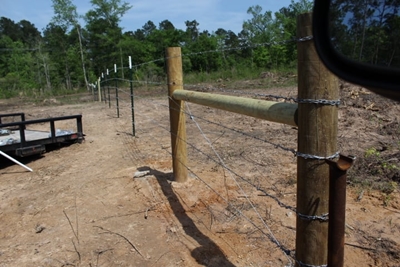
Setting T-Post: T-posts are driven into the ground with a hand held post driver or a powered post driver. The T-post are driven directly into the soil from 12" to 24" deep. They are designed to go directly into the dirt and not use concrete or other stabilizer, which makes the less expensive to install.
Secure Attachment: Attach the fencing material to the T-posts using
appropriate fasteners, such as fence clips or wire ties. Ensure the material is stretched taut and securely attached to prevent sagging or damage.
Gates and Openings: If your fence requires gates or openings, make sure to install them properly and securely. Consider using heavy-duty gate hardware to ensure longevity and smooth operation.
Maintenance: Regularly inspect your T-post fence for any signs of damage or wear. Replace any bent or damaged posts, and repair or replace any damaged fencing material. Regularly check the tension of wire or mesh and adjust as necessary.
Conclusion
Building a T-post fence offers numerous benefits, including versatility, durability, cost-effectiveness, and ease of installation. By following the best practices outlined in this article, you can ensure a successful and long-lasting T-post fence construction project. Whether you need to enclose livestock, protect a garden, or establish property boundaries, a T-post fence can be an excellent choice.